Showing posts with label food projects. Show all posts

Sunday, August 26, 2012

Patio Farming

Pin It As we did the last few years, we planted tomatoes, peppers and herbs for the summer. Due to the lack of space, we planted them in pots on our patio. So, it's like suburban patio farming of sorts. Despite the lack of space, I was pretty pleased with our harvest. For the tomatoes, we started from seeds and grew them into huge tomato plants.

We grew two types of tomatoes this year. This is Big Rainbow.

This is San Marzano.

These were Big Bertha and Yellow Bell. But on our weekend away, someone stole our Big Bertha (it was really big then) and one bell pepper. What has the world come to?
We also have Anaheim and jalapeno peppers.
We also planted a dwarf Meyer lemon tree. Lots of blossoms and lemons already.
Harvested Big Rainbow and San Marzano. The San Marzanos suffered a bit from blossom rut, but the Big Rainbows turned out beautifully.
See what I mean? This is the Big Rainbow after it has been sliced diagonally.
Overall, pretty successful despite our unfortunate pepper theft incident. At least I hope someone got to have some great peppers.

Friday, February 24, 2012

On Making Tofu

Pin It I suffer from bouts of insomnia. Actually, it's pretty often, like every other day. Most recently from some medications that I'm taking (speaking of which, I am also taking something else that could cause drowsiness, but it doesn't seem to offset the insomnia). Anyway, this is neither the time nor the place to discuss this. I only brought it up because I seem to have the best food ideas when I'm lying awake at night. And after about an hour of dreaming up these ideas and with no prospect of sleep in the near future, I get up and start making things happen. So my most productive hours tend to be between 4 am and 7 am (then I crap out at 3 pm).

This morning's brilliant idea: making tofu. This has actually been in the making since Christmas, after I received a SoyaJoy Total Tofu Kit as a part of my Christmas loot. It's been on the back of my mind to give this a whirl, but there's always an abundance of things to try so it's been on the back burner. Besides, I can buy a block of tofu easily around here. BUT! I am going to make something special with this -- not just any ol' tofu from the corner supermarket. I can't tell you what it is yet. You just have to come back for more...


The SoyaJoy Total Tofu Kit comes with a large bag of nigari (magnesium chloride), a tofu press box and a piece of cheese cloth. If you don't want to buy a tofu press box, you can use any sort of rectangular container with holes that allow drainage and you can apply pressure on the top (A meatloaf pan might work if there is sufficient drainage. Even something as simple as a sieve, if you don't mind a slightly irregularly shaped end product). The other two items are essential -- you cannot make tofu without nigari or a piece of cheese cloth.

I relied greatly on Just Hungry's guide to making tofu -- it's an excellent tutorial with lots of details and good advice. I'm posting pictures documenting my long, arduous process of making tofu and hopefully offer some practical advice.

You will need soy beans, which are dried edamame. But don't actually use edamame, because that won't work. You'll end up with edamame soup -- not a bad thing, just not the intended result. Dried soy beans are hard and yellow and look like this:


I used about a cup and half. They were rinsed and picked over, then soaked for 8 hours at room temp. After soaking, I rubbed them gently together between my palms to hull the tough outer skin. Then the soy beans were drained.


 Soybeans were added with a bit of water to a food processor and pulsed until foamy.


Then I added the blended soy beans with 6 cups of water to a large pot. I slowly brought it to simmer over low heat. If you try to heat it up too quickly, it would either foam and boil over or scorch the bottom of your pot.


After the mixture simmers, the foam will slowly go away. Keep the heat low for 20 to 30 minutes. Remember to stir frequently so the bottom doesn't burn.


The fibrous soy bean starts to separate from the milk. You can see the granules on my spatula.


I poured soy milk mixture into a colander lined with cheese cloth. Then I squeezed the cheese cloth to get all the soy milk out.


It's been 10+ hours and I had soy milk! It tasted bean-y and has that great soy taste that I grew up with. The supermarket soy milk nowadays tastes nothing like this. For this alone, the effort was worth it.


Soy milk goes back into a pot (a different pot) and slowly brought to about 165 degrees Fahrenheit. Turn off heat. I dissolved 3 teaspoons of nigari that came in the kit in a cup of warm water. I poured it little by little around different parts of the pot and stirred it gently. Cover and wait 15 minutes.


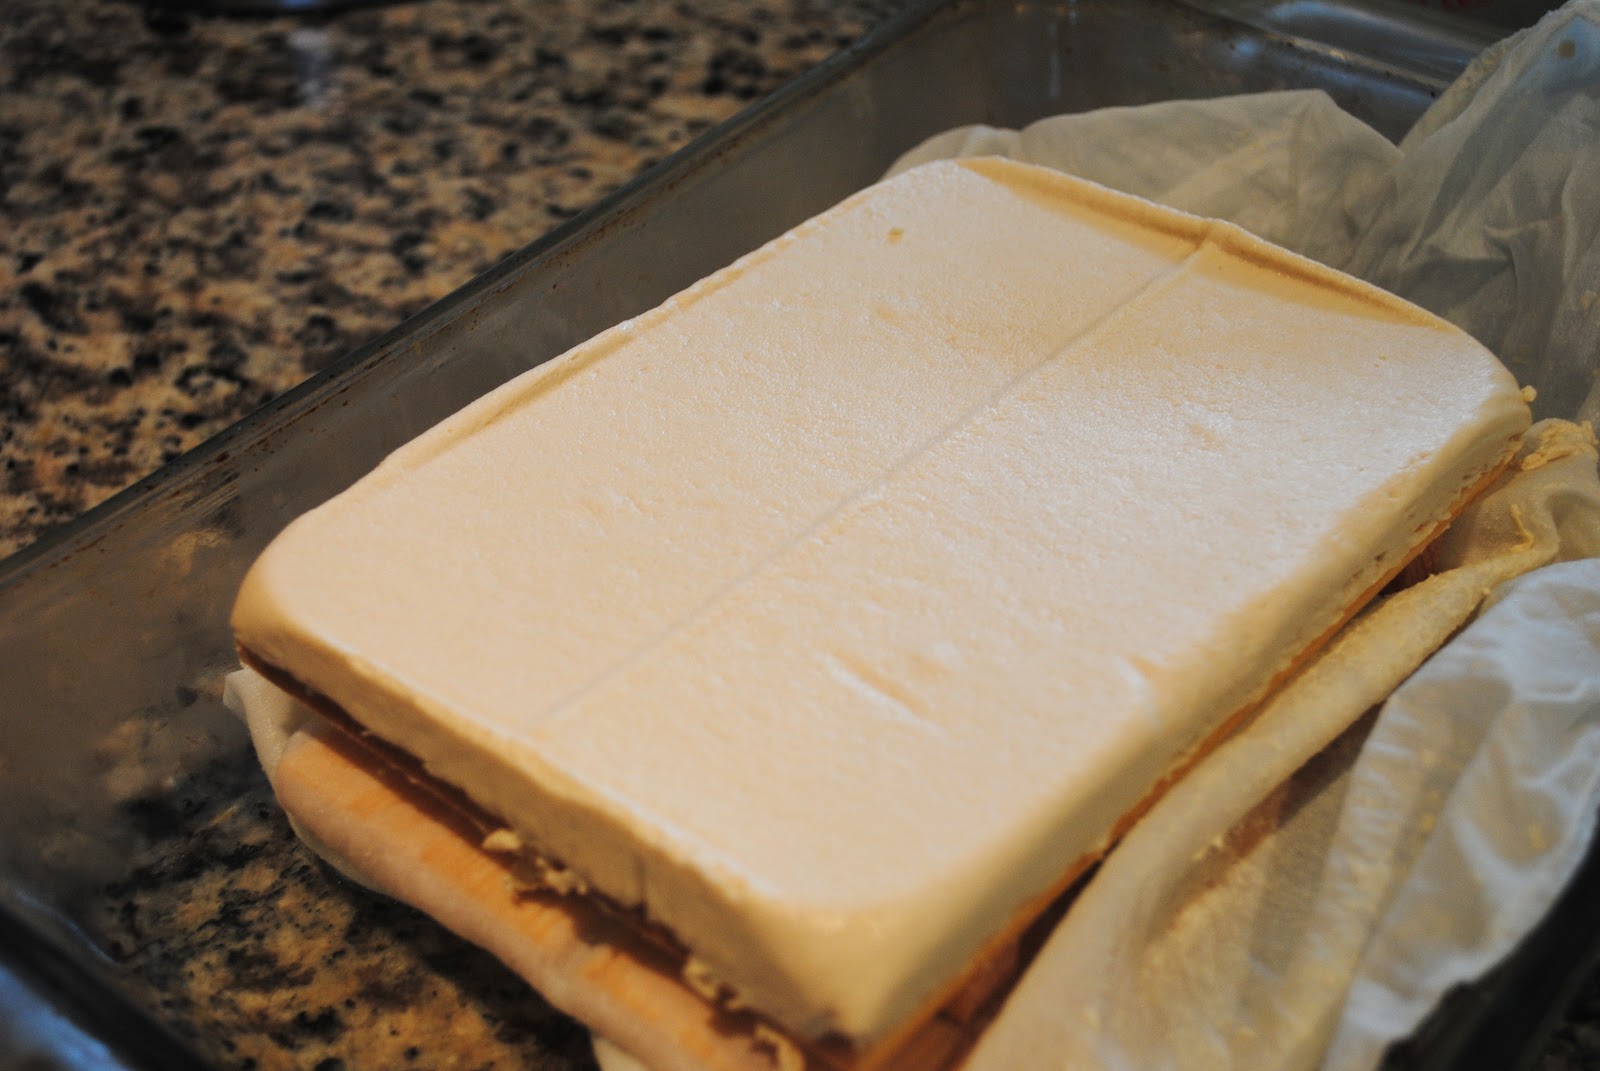
I poured the mixture directly into the mold lined with cheese cloth.


Weighing it down with an empty measuring cup. I would later add water into the cup to increase the weight. I put the mold into a pan and stuck it in the fridge overnight.


Twenty-four hours after I started the process, I have a tiny one-inch thick block of tofu.

Random thoughts on my tofu making project:
  • You need a lot of soy beans to make very little tofu. Next batch will be a much bigger batch.
  • Well, if there is a next batch. The process is long and laborious and I used every pot and container in my disposal, making the clean up process equally long and laborious.
  • Every single surface of my kitchen was covered with some sort of soy bean by-product -- curd, milk and fiber. And they don't come off very easily.
  • The result is very bean-y, like the tofu that I used to have as a kid. Unlike most of the supermarket versions, this one is preservative free and very flavorful.
  • I think I need to do something about my insomnia.

Thursday, September 29, 2011

Our Bounty

Pin It

Remember a long time ago, we planted some tomatoes? Well, we finally have some fruit to show for it. And they are good lookin'! These are called pineapple heirloom tomatoes and they come in vibrant yellow and orange. We still have a couple on the vine (and one got stolen... it looked that good!) but this is the bulk of our bounty. Oh yeah, a couple of green zebras snuck in there.


Look at the pretty colors! I kept this really simple. Whole wheat pasta tossed with gently cooked tomato, some garlic, red pepper flakes, salt, sugar and chopped parsley. And we have stunningly fresh and simple dinner.

Thursday, August 18, 2011

First Tomato Harvest

Pin It

This here is called green zebra. Very descriptive name, huh? It's our first tomato of the season! There are plenty more on the vine. Now, I have to come up with a way to use them...

Tuesday, July 5, 2011

Summer Pickling Fun

Pin It

It took us about a year to finish the pickled vegetables that we made last summer. It was such a success that we decided to do it again this year. We streamlined the process and focused on cucumbers and jalapeno peppers this year. Also, we used the canning process to make a shelf stable product. The fridge pickles were good, but they took up too much valuable territory. This time, we can tuck away these jars in the pantry and use them when we need them. In a couple of weeks, we'll find out if these turned out successful or not. Until then, let's just admire all these pretty jars...

Tuesday, May 17, 2011

Herb Garden

Pin It Even though there's a lack of outdoor space, we do get plenty of sun. So instead of paying $1+ a pop for herbs that I'd use once before they rot in the refrigerator, we planted some herbs in window boxes so we'd get fresh herbs throughout the summer.


From left to right -- opal basil, Greek oregano, peppermint, rosemary and French thyme.

We also planted some heirloom tomatoes, jalapeno peppers, shallots and garlic. I can't wait for harvest time!

Monday, April 11, 2011

Spinach and Oyster Mushroom on Creamy Polenta

Pin It For Christmas, I got myself and VB's mom oyster mushroom growing kits from Back to the Roots. Between the traveling and all the other stuff that's going on, I didn't get a chance to grow oyster mushrooms right in my kitchen until last month. It was really humid with lots of rain, so my first attempt never yielded any edible -- just a blue moldy mess. I contacted BTTR to let them know about my experience and they were kind enough to send me a replacement kit. A few days later, I had some gorgeous oyster mushrooms right on my kitchen counter!


I tried to showcase the fresh, meaty mushrooms by preparing them simply. I sauteed them quickly with fresh spinach, sliced onion, red pepper flakes and some lemon juice and then added them to a bed of creamy polenta.


Polenta can be a great and quick component to many dishes. It can be done in 5 minutes with a lot of whisking. The star here is definitely the oyster mushrooms, which are meaty and flavorful. Check out BTTR for more information on these neat little kits.

Wednesday, December 29, 2010

Christmas Loot

Pin It

Somehow (not that my Amazon Christmas list had anything to do with it) word got around that I like cooking. So for Christmas, I got a collection of new cookbooks! And kitchen items like a new steamer (to replace the one that I burned) and a new pot (to replace the one that I burned) and a cooling rack and a herb keeper (which I broke already, ugh) and a new pizza stone (I actually had nothing to do with the previous one cracking in half).


I'm excited to get cooking. In fact, we already used the pizza stone to make delicious pineapple and jalapeno pizza and broccolini olive pizza.


See the cooling rack in action!

Did I mention we got COOKIES? We got way too many cookies for just the two of us. But we will try our very best, as hard as it may be, to eat every last one. We're tenacious like that. Pfeffernüsse is my very favorite. Must! Resist urge to eat the whole bag.


My plate runneth over, as you can see.

And! For our next food project, we will be growing oyster mushrooms at home. I bought a kit for VB's mom, but couldn't resist the free shipping offer for two. So I got one for myself as well. I'm eager to grow some delicious mushrooms! But that's another post for another day.

Thanks to everyone (you know who you are) for making this Christmas fun and memorable! Sorry I ate so many cookies!

Saturday, October 9, 2010

Our "Harvest" + Creamy Tomato Fennel Pasta

Pin It When we planted tomatoes a few months ago, I had fantasies of making awesome sauces and chutney from plump, sweet tomatoes that we grew ourselves. Or that I would can them and enjoy delicious tomatoes year round. Or that I would make my own ketchup or barbeque sauce for family and friends. Or all of the above. I just imagined baskets and baskets and sweet tomatoes, so much so that we'd joke about opening our own farm stand. Basically, I hoped to be a pig-in-shit happy, except with tomatoes. Instead, we got this --


This is truly pathetic. In fact, perhaps one of the most pathetic in the history of harvests. Thank goodness we have day jobs that enable us to actually buy food instead of relying on our "farming" skills to feed ourselves. I blame the poor result in part on the weird weather pattern this year. We hardly had much of a summer at all, then it got ridiculously hot for two weeks in September and now the temperature has plummeted to the 50s and 60s. Also, we planted way too late into the season. There are still a few that may ripen over the next week or so, but the plants are slowly dying and we still have a lot of green tomatoes that may never ripen.

Well, at least we can get something out of this, right? (besides a cautionary tale of "what not to do next year.") I made this delicious pasta dish to showcase the freshness of these tomatoes. Unfortunately, I had to supplement our "harvest" with store-bought and canned tomatoes. Big sigh.


For this creamy tomato and fennel pasta, you'll need:
  • 2 tablespoons of olive oil
  • 2 tablespoons of butter or dairy-free butter substitute (I used Earth Balance)
  • 1 small yellow onion, diced
  • 1 fennel bulb, diced
  • 5 medium tomatoes, diced
  • 16-ounce can of crushed tomatoes
  • 1/2 cup of white wine
  • 1/4 cup of cream, half-and-half, milk or soy milk (I used unflavored, unsweetened soy milk)
  • 4 cloves of garlic, minced
  • 1 teaspoon of red pepper flakes
  • juice from 1/2 lemon
  • 1 pound of dried pasta, cooked
  • salt and pepper to taste
In a large skillet, saute diced onion in olive oil over medium heat until softened, about 5 to 8 minutes. Add red pepper flakes and garlic and cook until fragrant, about a minute. Add diced fennel and stir to combine. Add white wine and lemon juice and allow liquid to reduce to half. After the liquid has reduced, add fresh tomatoes and canned tomatoes. Season with salt and pepper. Turn the heat to medium high and cook for 5 to 8 minutes or until the tomatoes are soft. Stir frequently. Stir in cream/milk/soy milk. The sauce should be a nice bright pink color. Cook for another minute or so. Just prior to adding pasta, stir in butter/butter substitute. Toss with pasta and serve.

Sunday, September 19, 2010

Intruder Alert!

Pin It

It's been a couple of months since we planted our tomato and pepper plants on the back patio. So far so good! It looks like we're going to have a lot of ripe tomatoes and quite a few peppers as well. The Anaheim peppers got so big and heavy that the stem couldn't support them. So we picked a few even though they're probably not 100 percent ready.


But I found this creepy crawling intruder on the tomato plants the other day and it sort of freaked me out.


It looks like it has been making itself comfortable -- a lot of the leaves were half-eaten already. Even though VB is a vegetarian, the no-kill policy has not been extended to any bugs or worms. But the catch is -- I'm the resident bug killer of this house. Generally I have no qualms about crushing a bug or two, but this squishy green thing is the size of my pinky finger and probably has gooey and sticky insides. Ew. I chickened out and just took off the leaf with the bug still on it and tossed it over our fence. Sorry, neighbors.

I hope no more bugs crash our back patio and we can have tomatoes soon! I'm thinking about canning our bounty or make some ketchup or tomato sauce. So stay tuned.

Tuesday, July 27, 2010

Late Summer Food Projects

Pin It

VB has taken a keen interest in pickling, possibly to compensate for our epic FAIL on homemade sauerkraut. So despite having a ton of stuff to do at home, we still managed to get two food projects off the ground. This one came with a big assist from VB's mom, who mailed some pickling salt and spices to us. We found some large quart sized wide mouth jars and added sliced cucumbers, carrots, onions, zucchinis and radishes. They look so pretty in those jars! This is a quick pickling process and only requires five to seven days of refrigeration. So we will be enjoying them very very soon.


The other project is equally delicious but we have to wait a bit longer before we can enjoy it. We're planting tomatoes and peppers! It's a bit late in the season considering most tomato plants should be bearing fruit by now, but we're hoping to have some tomatoes by late summer/early fall.


As for the peppers, we already have some baby jalapenos and Anaheim peppers (can you spot them?). I can hardly wait!


Totally unrelated, here's a picture of Tangerine living the good life -- lying in the sun with a full belly. All she needs is a pillow and a drink with a tiny umbrella in it.